

[CMP v1] HOW-TO: Setup (Install) Secure Privacy
Introduction
This guide provides a detailed checklist for installing and configuring Secure Privacy on your website, covering script installation, blocking setup, audience targeting, cookie categorization, banner text, consent buttons, and privacy policy integration.
Who Is This Guide For?
- Website administrators managing privacy compliance
- Web developers integrating compliance scripts
- Privacy officers and marketers handling cookie consent
Secure Privacy Setup Checklist
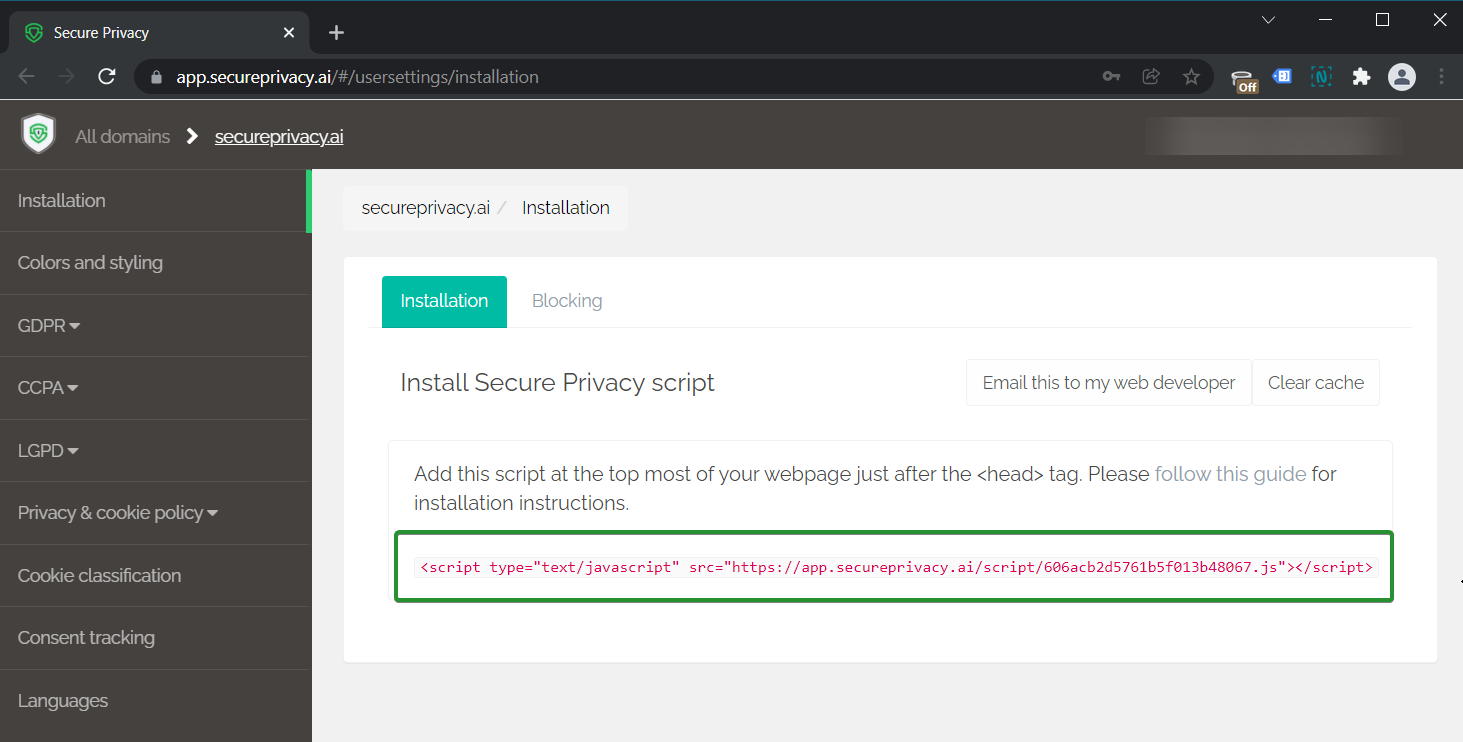
1. Check if the script is installed correctly
Go to the Installation page in your Secure Privacy dashboard and copy the script line.
Paste the code at the top of the <head> tag in your website or CMS code view.
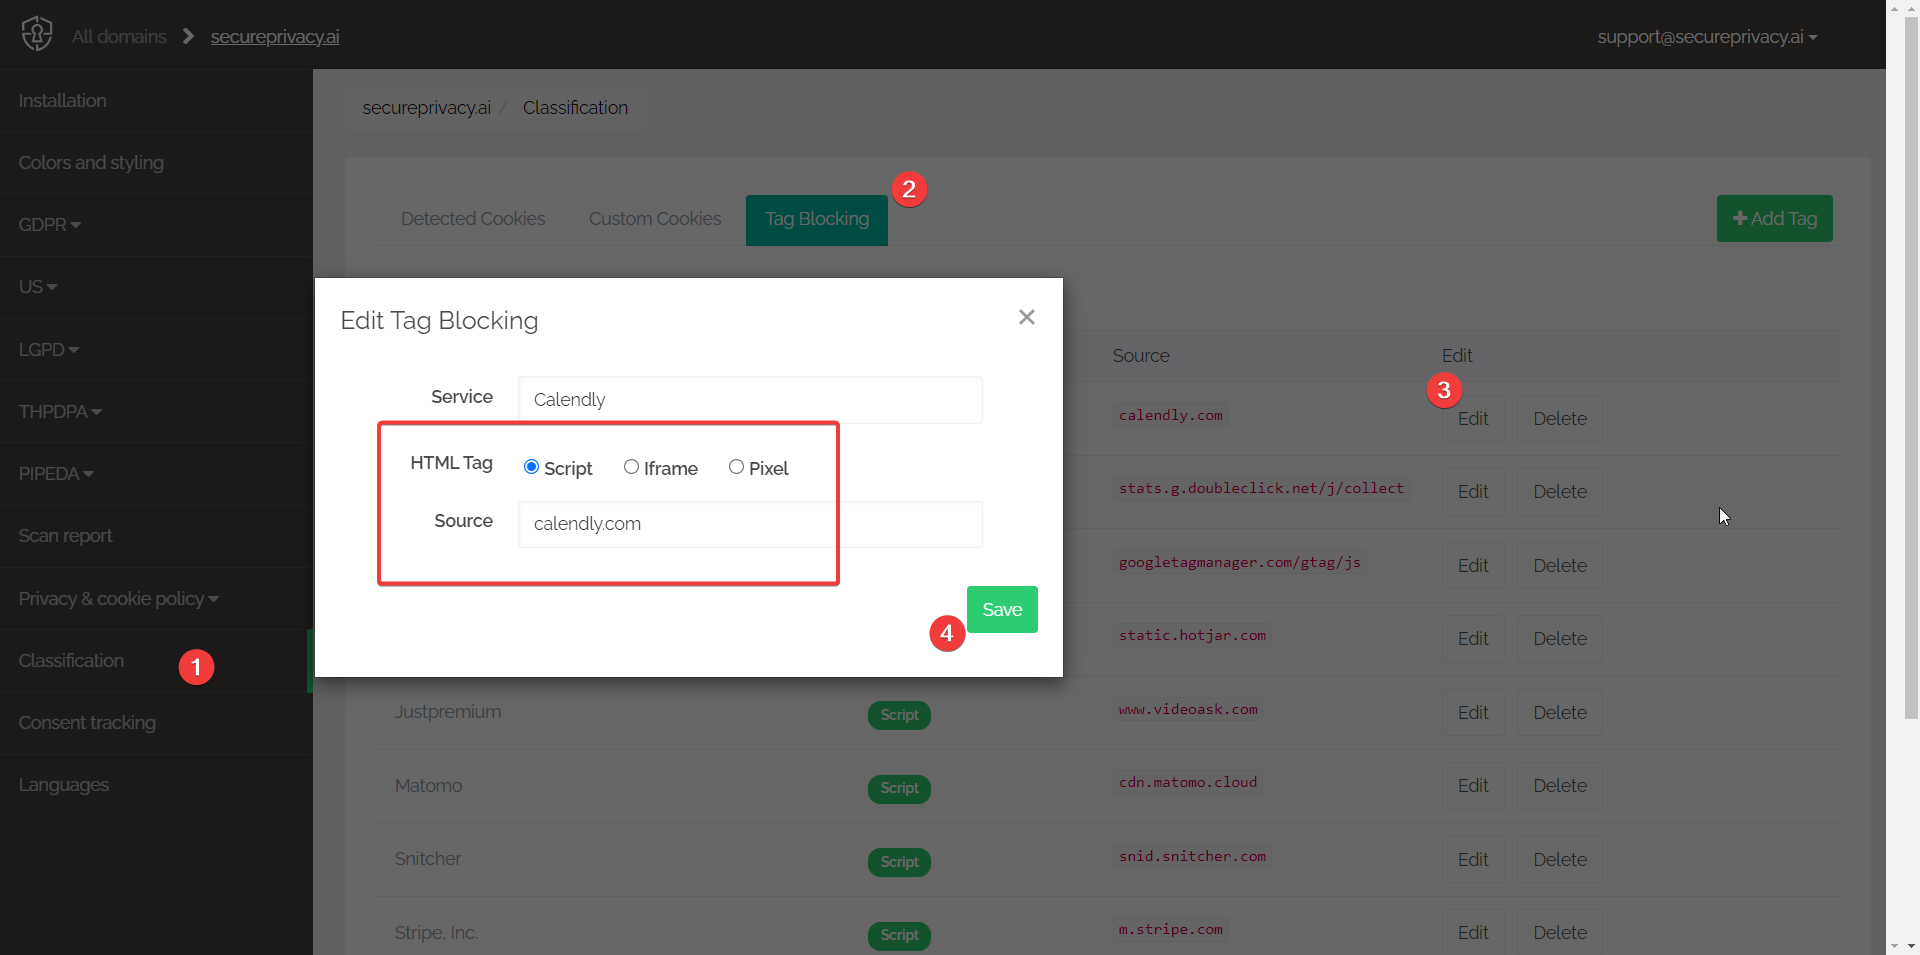
2. Set up your blocking configuration
If you have script, iframe, or pixel sources from your implementation team, add these in the “Tag Blocking” tab to enable blocking those sources.
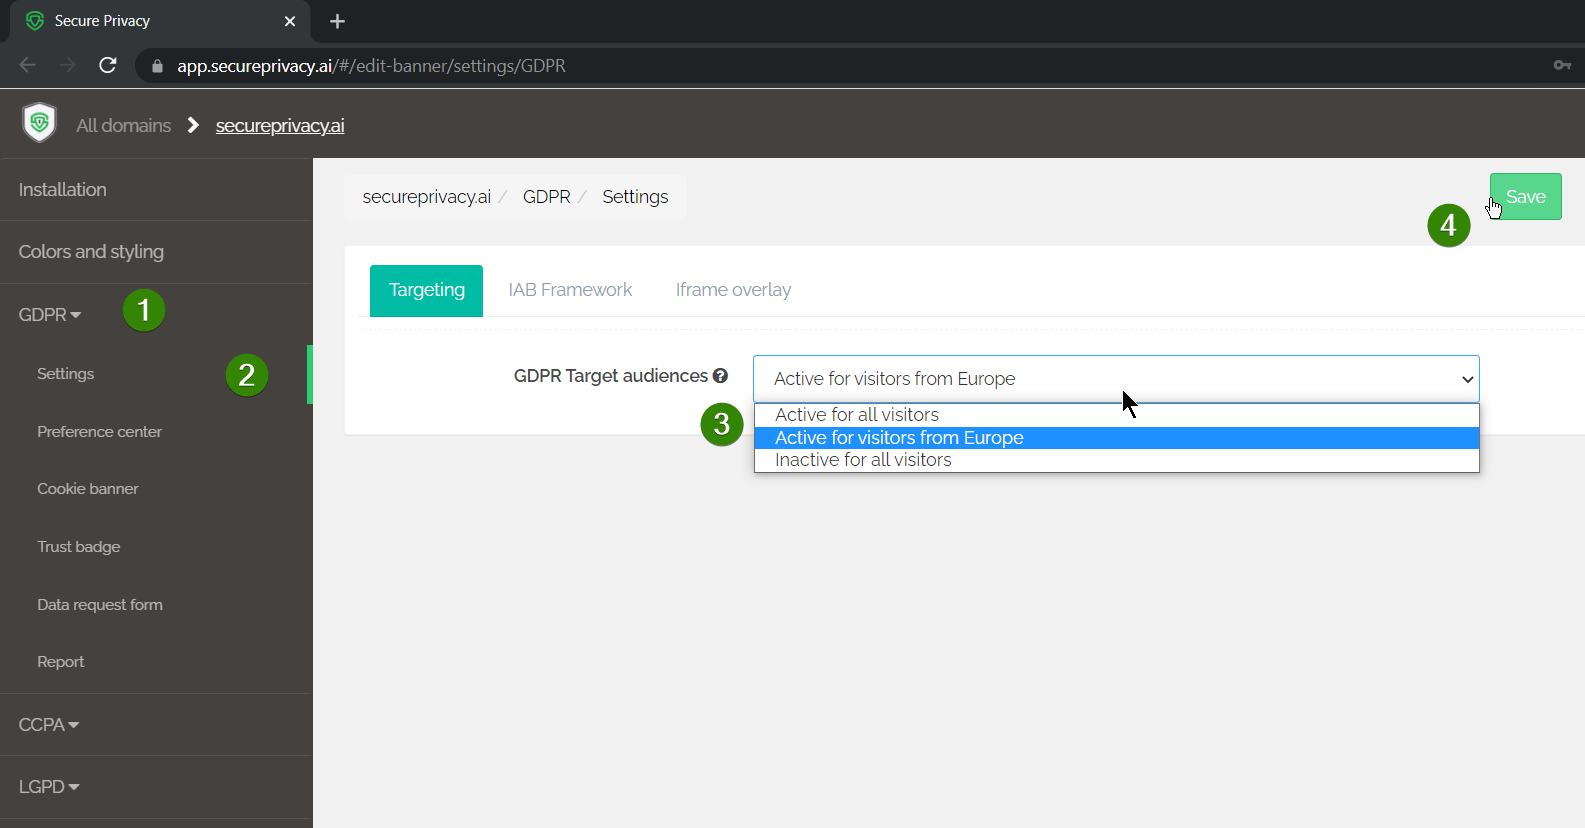
3. Review the target audience setup
Select the appropriate target audience per compliance module:
- GDPR: Active for visitors from Europe
- CCPA: Active for visitors from California
- LGPD: Active for visitors from Brazil
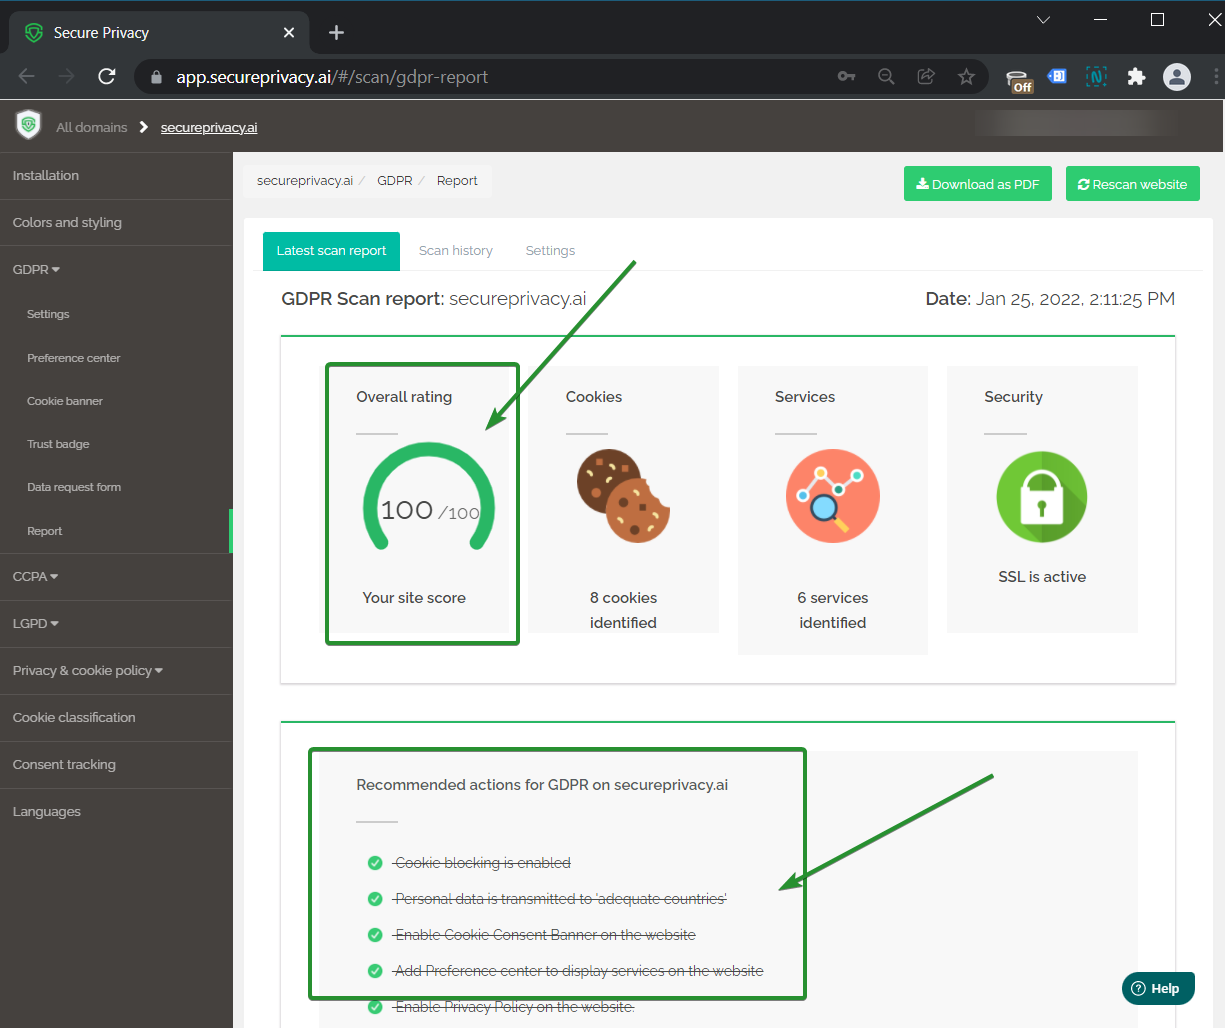
4. Examine your overall rating and recommended actions
Check your latest scan report. Aim for a 100% compliance rating and follow the recommended actions to improve your score.
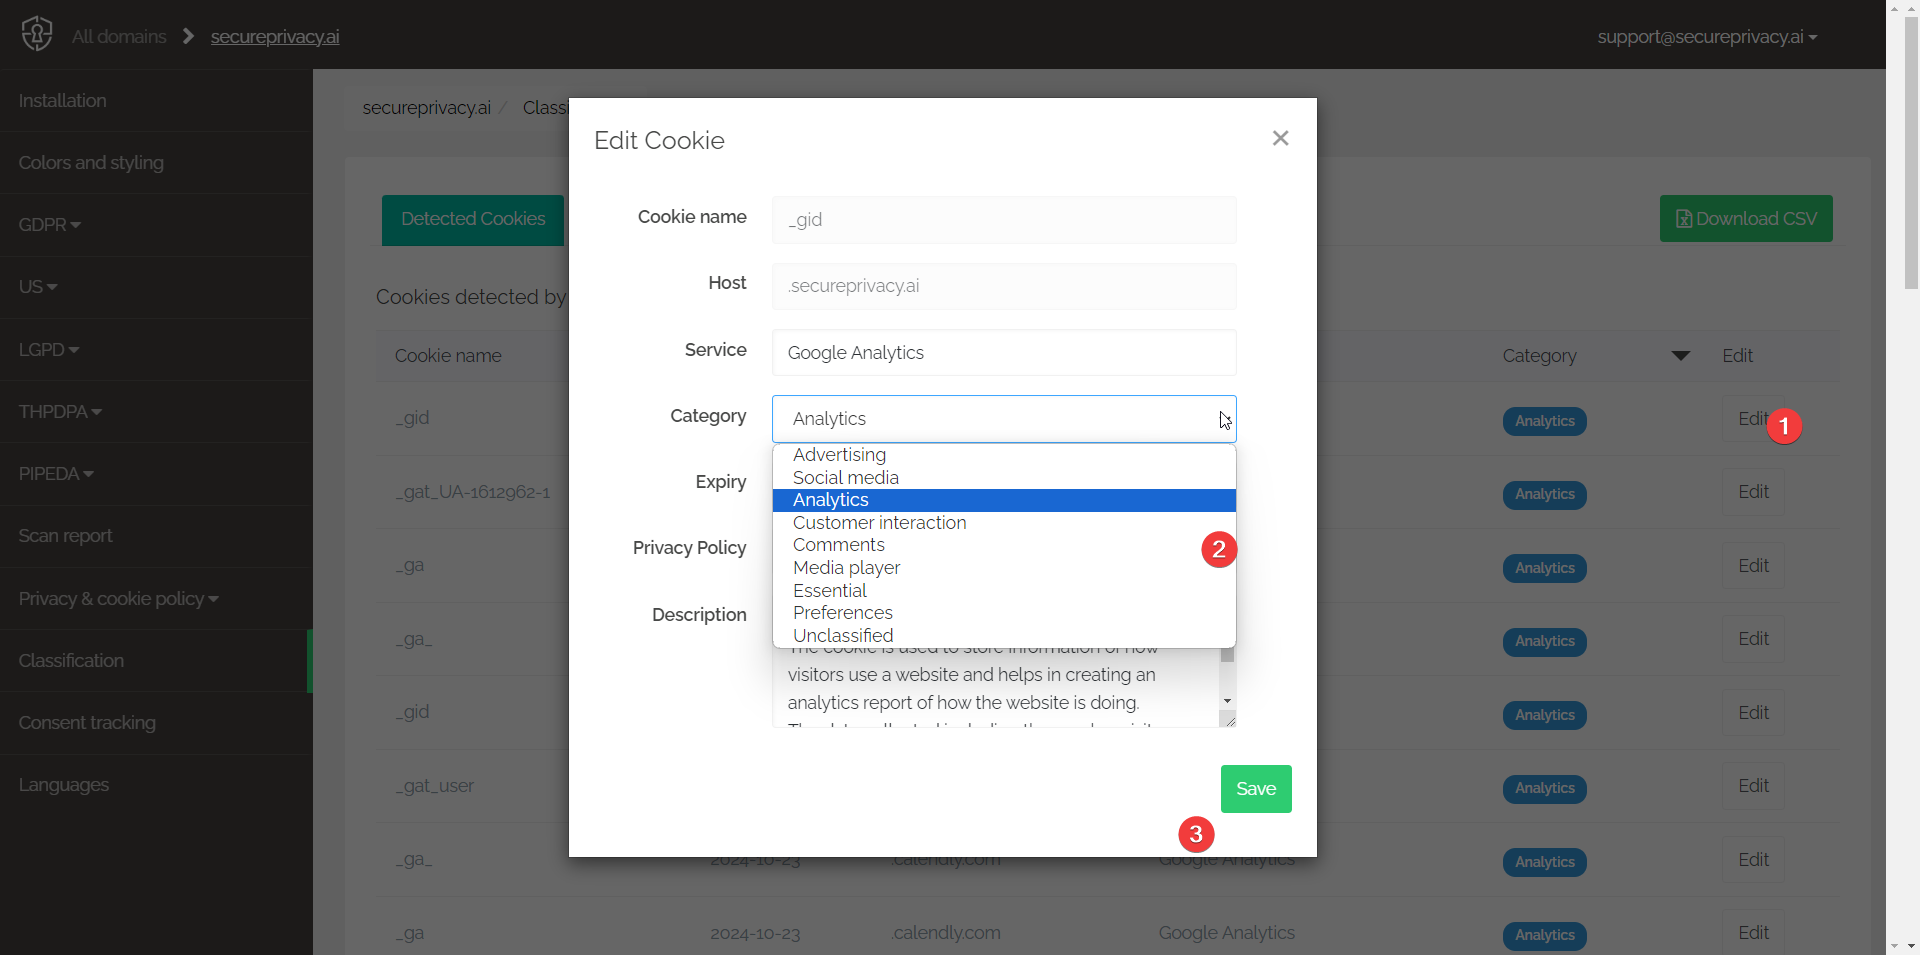
5. Review and categorize cookies
Use the “Classification” tab to review and update cookie categories assigned to detected services.
More information on cookie categories can be found in the support article here.
6. Analyze and update the text on the cookie banner
Clearly communicate each cookie category’s purpose on the cookie banner.
Examples:
- Essential cookies: “We place essential cookies to enable our website to function correctly.”
- Analytical cookies: “We place analytical cookies to gather aggregated statistical information about visitors.”
- Advertising cookies: “We place advertisement cookies to optimize our marketing campaigns towards visitors.”
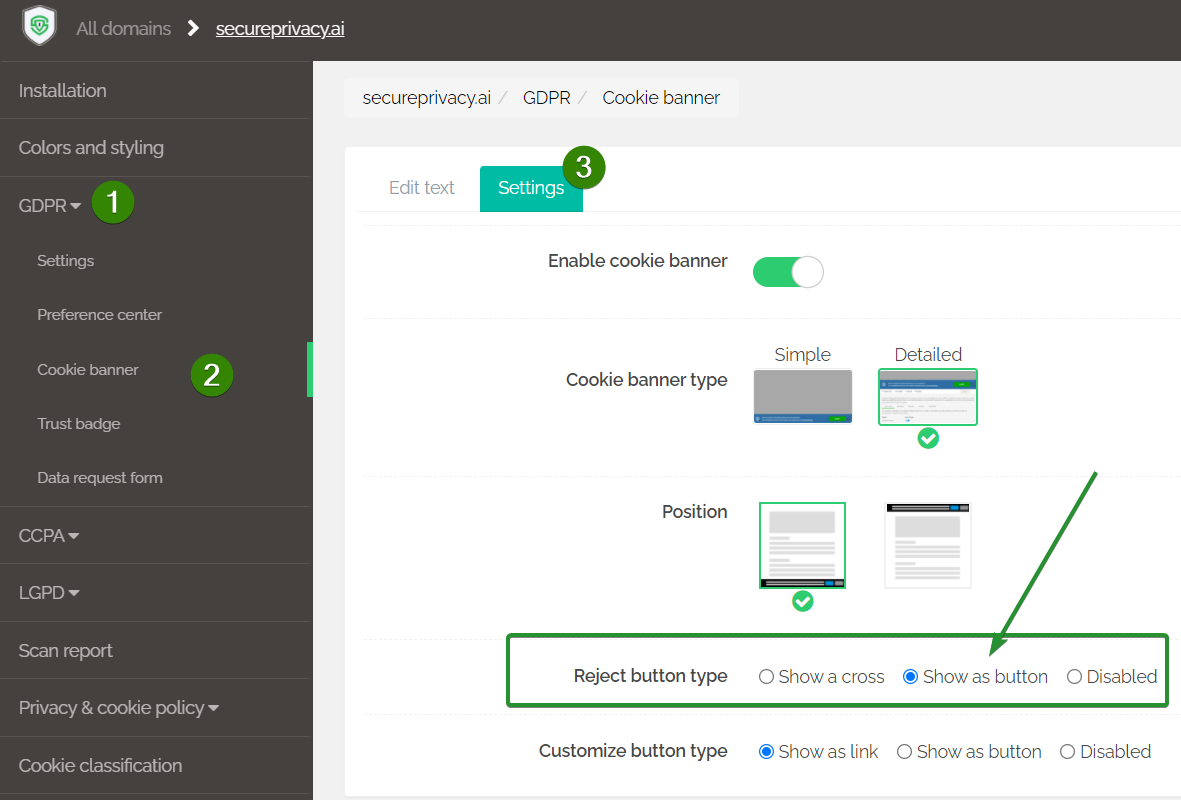
7. [GDPR] Check both Accept and Decline buttons are present
GDPR requires both Accept and Decline buttons on the cookie banner.
Enable the Reject button via GDPR → Cookie banner → Settings by switching “Reject button type” to “Show as button.”
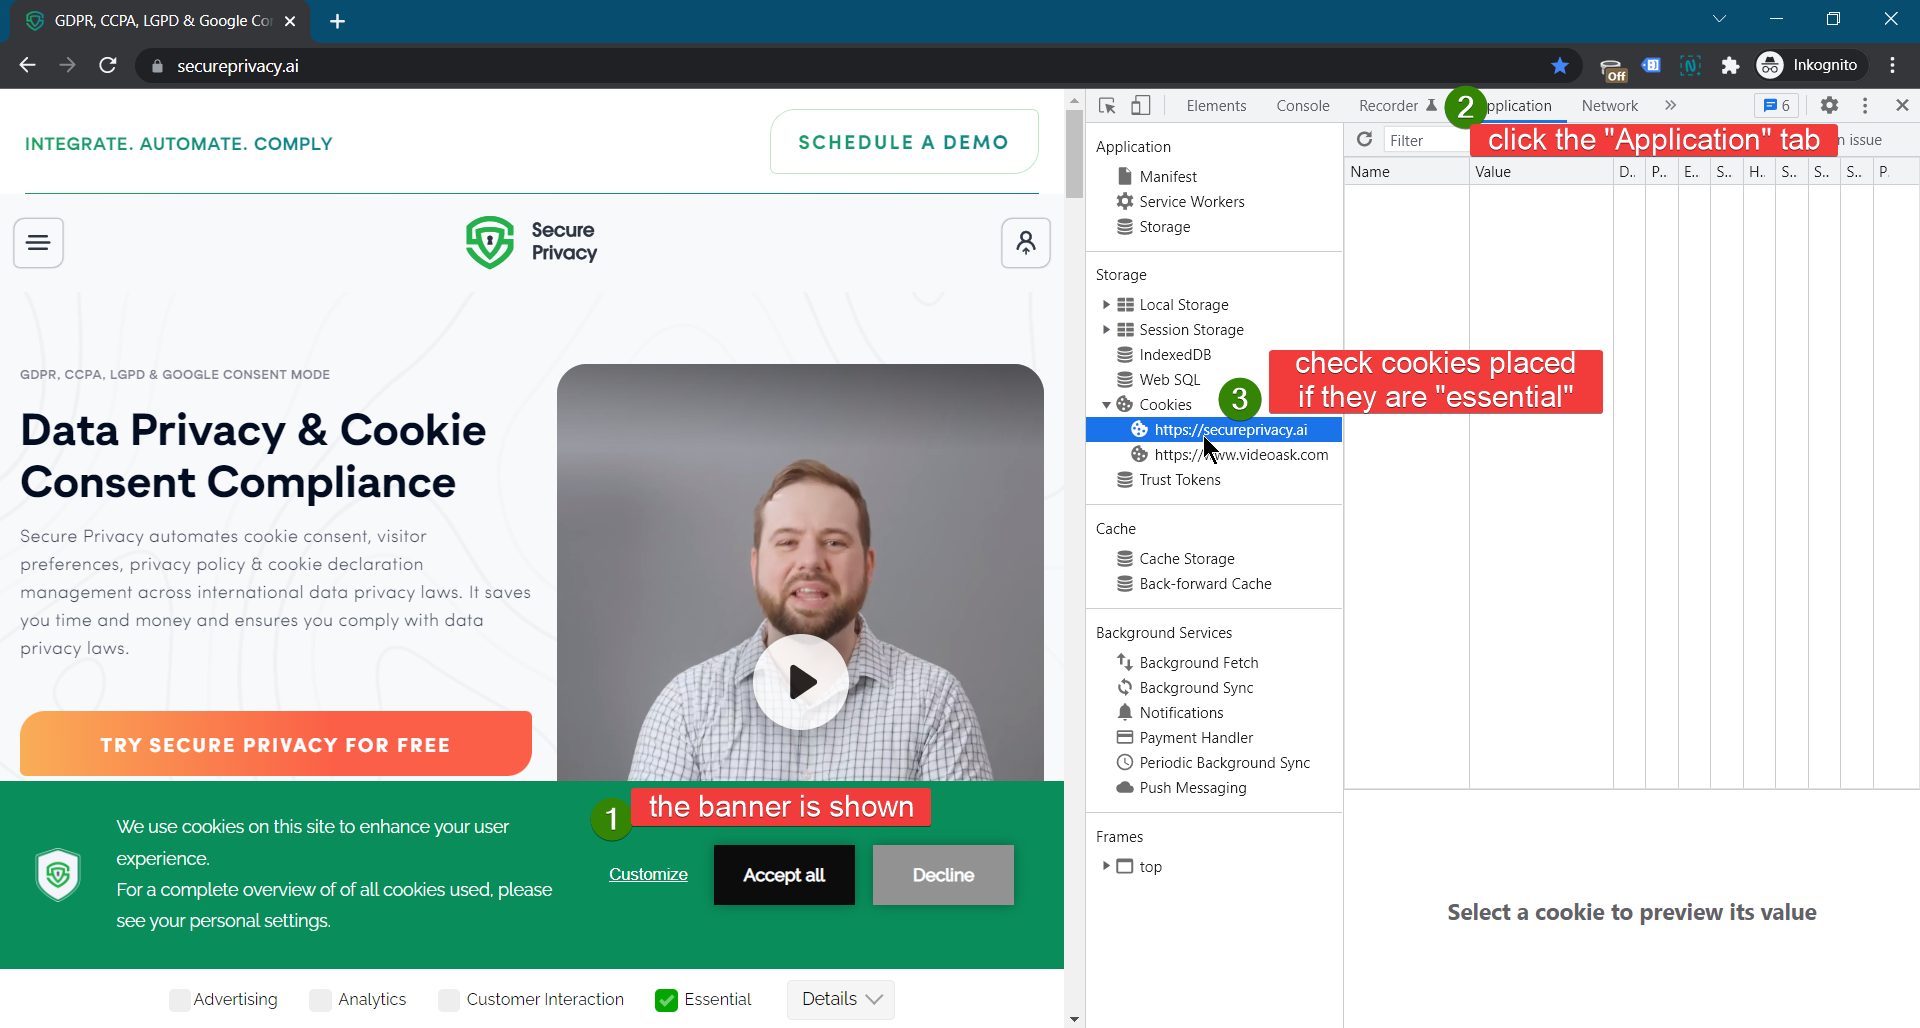
8. Inspect cookies being placed before giving consent
- Open a Chrome Incognito window with developer tools enabled.
- Visit your website and keep the cookie banner open without interacting.
- Check the Application tab to see cookies placed and confirm only essential cookies appear.
Repeat Steps #2, #3, and #4 to improve compliance rating as needed.
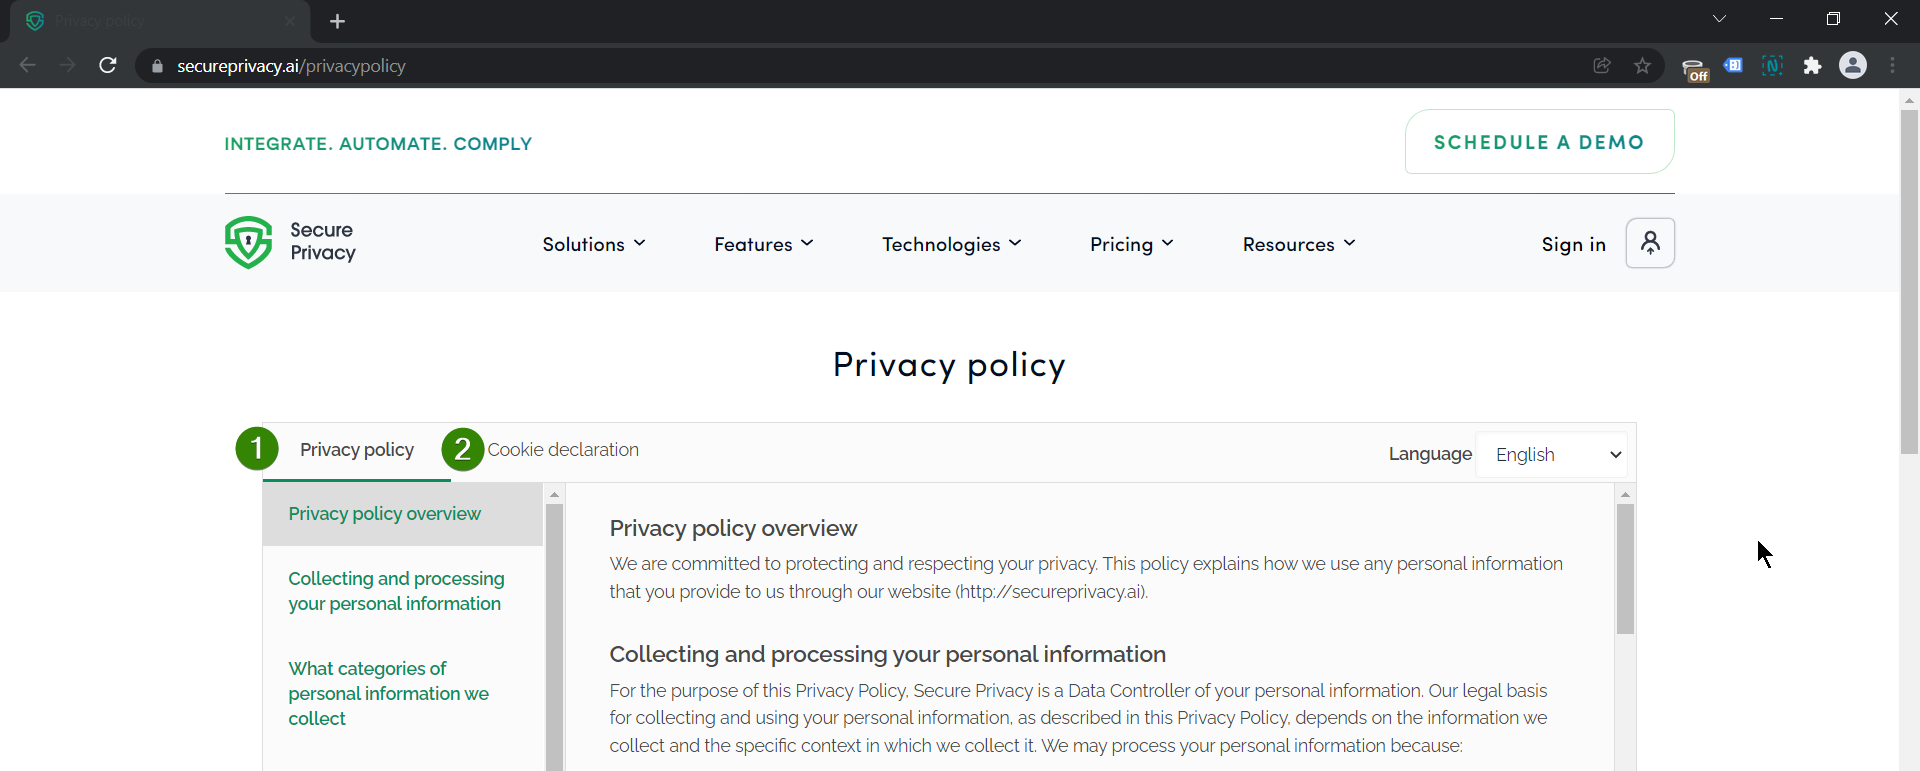
9. Enable privacy policy and cookie declaration
To foster trust and transparency, enable the following compliance features on your website:
10. [OPTIONAL][ENTERPRISE] Configure the Scan Behind Login feature
This feature allows scanning of content behind user authentication, such as restricted or logged-in areas.
More information is available on the Authenticated scans via Scan Behind Login setup guide.
Common Issues & Fixes
- Script not running on site
- Ensure the script is inserted exactly at the top of the <head> tag and clear all caches.
- Tag blocking ineffective
- Verify all sources are listed and saved in the Tag Blocking tab.
- Accept/Decline buttons missing
- Double-check GDPR Cookie banner settings for the Reject button.
See Also
- How to block cookies in complex GTM triggers
- Implementing Google Consent Mode (Advanced) using Google Tag Manager
- Ensuring Compliance with Google’s EU User Consent Policy