

This article will guide you through the steps to display your company's logo directly within your Secure Privacy Preference Center, providing a more consistent and branded user experience.
Steps to Enable Your Preference Center Logo:
- Log in to Your CMP Dashboard:
Begin by logging into your Secure Privacy CMP dashboard.
- Navigate to Designs:
Once logged in, head over to the Designs tab in your dashboard.

- Select Your Design:
Click on the specific design that you wish to modify. This is typically the design associated with your respective domain.
- Go to Preference Center Settings:
Within your selected design, navigate to the Preference Center settings.
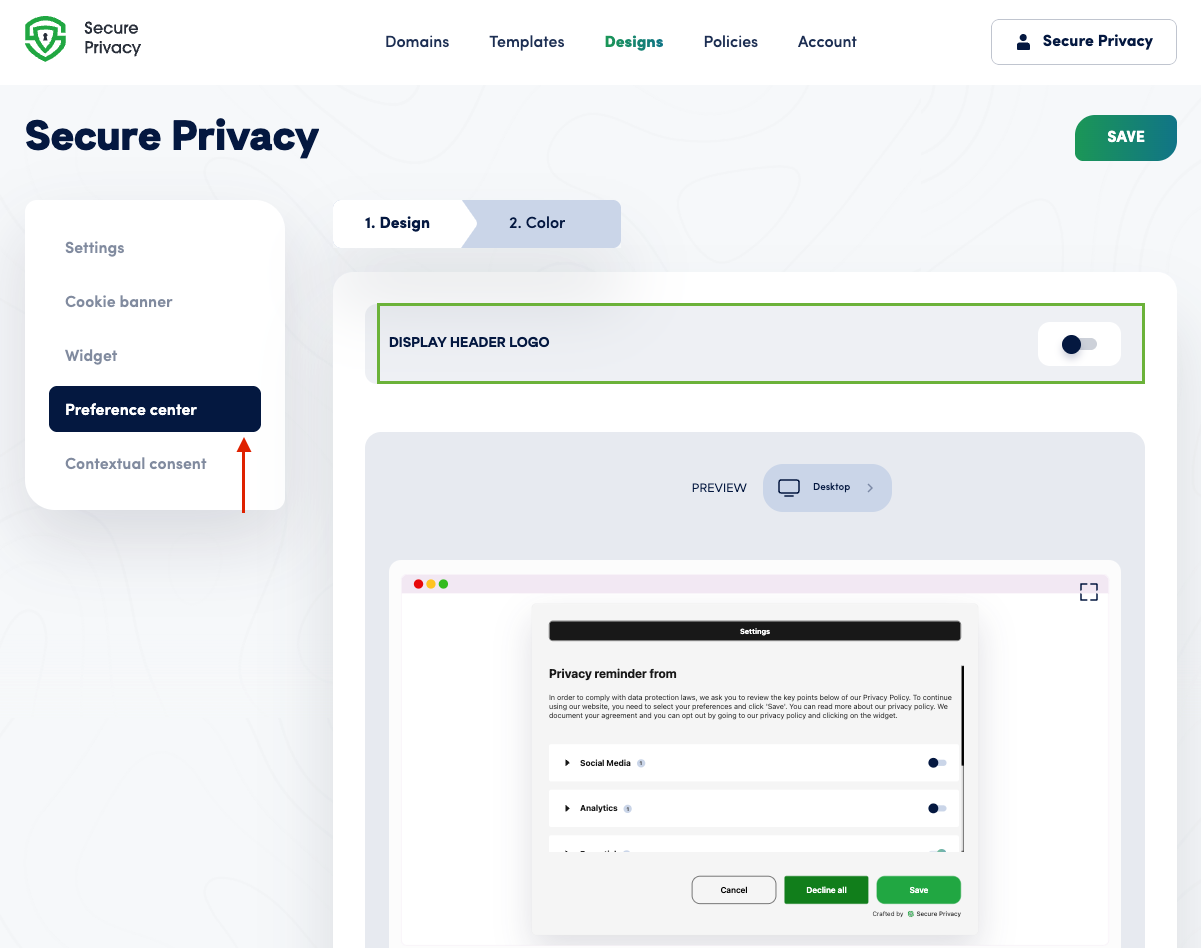
- Locate "Display Header Logo" Toggle:
As illustrated in the image above, you will find a toggle labeled "Display Header Logo."
- Enable the Toggle:
Enable this toggle to activate the display of your company logo in the Preference Center.
Important Note: The logo that will be displayed in the Preference Center is the same logo you have already set up or need to set up under the Settings tab within your overall Secure Privacy account.